ⓘ Important
This content applies to the Windows Virtual Desktop Spring 2020 update public preview with Azure Resource Manager objects.
Click here for guides using Windows Virtual Desktop Fall 2019 release without Azure Resource Manager objects.
Creating a host pool with the Azure portal is the first step in deploying Windows Virtual Desktop. A host pool is a group of identical virtual machines (VMs). These VMs are knows as session hosts, and they are what the users connect to. The session hosts are configured to provide either a full desktop experience, a set of applications, or both.
In this article I will walk you through creating a host pool with the Azure portal, which includes:
- Registering the Microsoft.DesktopVirtualization resource provider
- Creating a host pool for Windows Virtual Desktop (WVD)
- Creating the VMs
- Joining the VMs to the Active Directory domain
- Registering the VMs with WVD
Register the DesktopVirtualization resource provider
Before you can create a host pool, or any other WVD ARM objects, you will need to register the DesktopVirtualization resource provider.
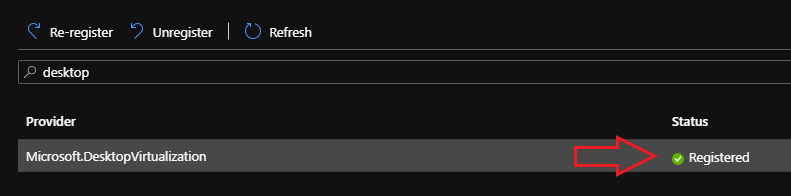
- Start by navigating to Subscriptions.
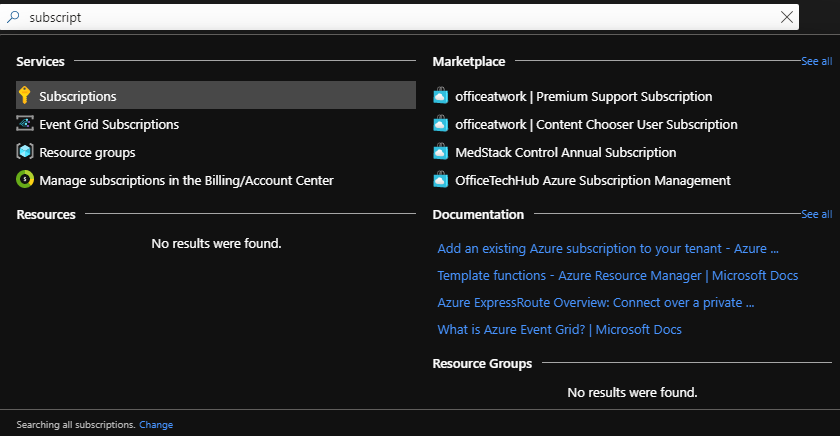
- Then select your subscription from the list.

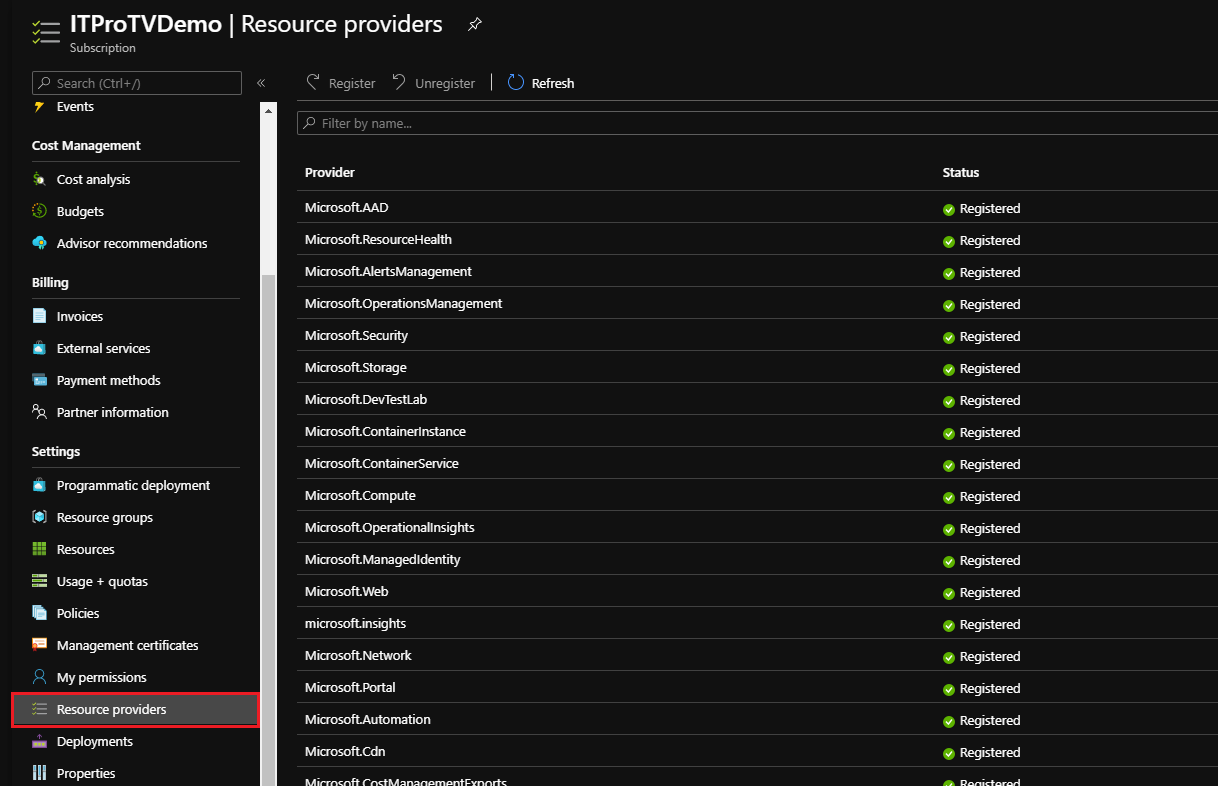
- Under Settings, select Resource providers.
- Search for desktop, select the Microsoft.DesktopVirtualization provider, and click Register.
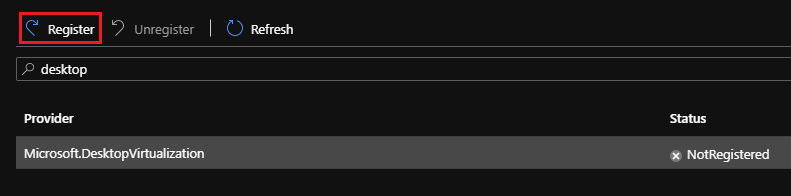
- Refresh the pane and verify the provider status is Registered.
Start the host pool ARM template
Once you have registered the DesktopVirtualization resource provider, you can use resource templates to create WVD resources. These templates are JSON documents which can be deployed repeatedly with consistent results. This is just one of the benefits of WVD being ARM-based, you can read about more benefits in this post.
To begin creating the host pool:
- In the Azure portal search for Windows Virtual Desktop, and select Windows Virtual Desktop under Services (Windows Virtual Desktop – Provision a host pool under Marketplace is the Fall 2019 release)
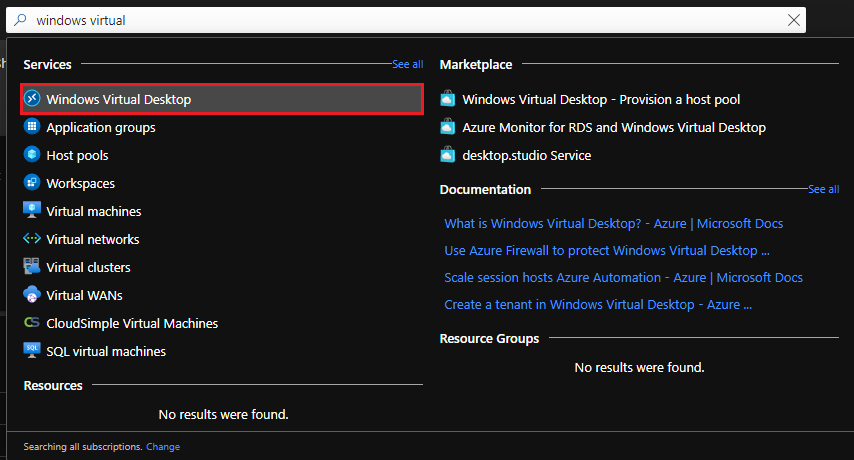
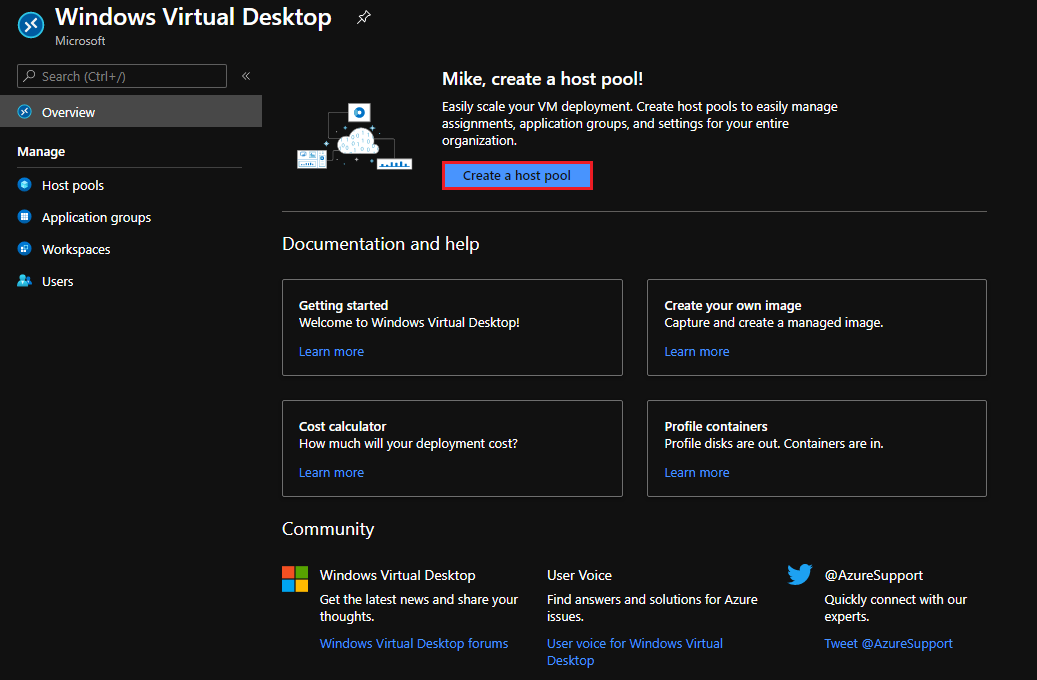
- This brings you to the Windows Virtual Desktop overview page. Here you can create and manage the various WVD objects. Next, select Create a host pool
The host pool template is divided into four sections:
- Basics
- Virtual Machines
- Workspace
- Tags
Basics
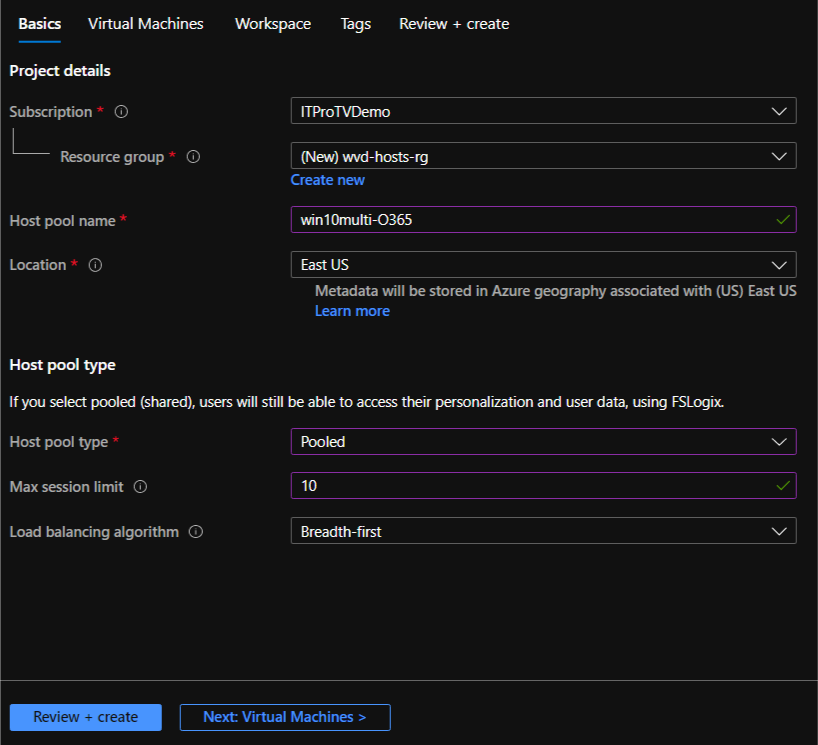
On the Basics tab, you will provide details about your project, and the host pool type.
In the project details section:
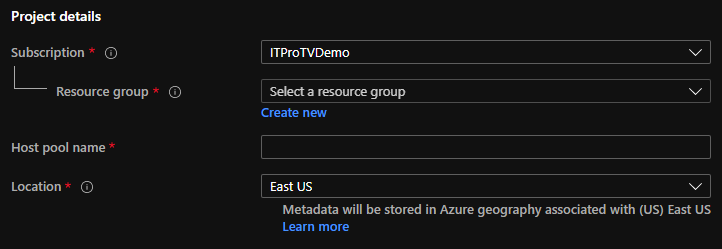
- Subscription: Select the subscription you are creating the WVD resource in.
- Resource group: Click Create new to create a new resource group or select an existing resource group to contain the host pool resources.
- Host pool name: Provide a unique name for your host pool. I like to use a name that describes the host pool VMs.
- Location: Select the region where the host pool will be created. The metadata will be stored in the same region.
In the Host pool type section:
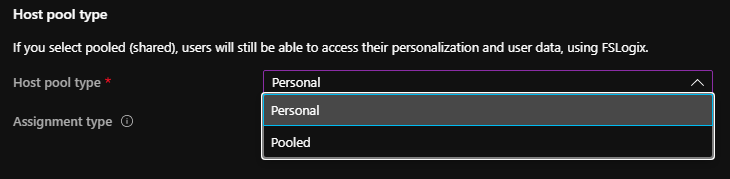
- Personal: A personal host pool means each user will be assigned their own VM.
- Pooled: A pooled host pool is a shared environment where multiple users will be connected to the same VM. This takes advantage of the Windows 10 Multi-session edition, which is only available through WVD.
If you select Personal, specify the assignment type:
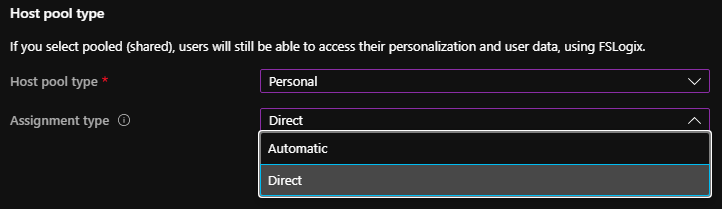
- Automatic: The service will assign an available session host to the user.
- Direct: An administrator will assign a session host to the user.
If you select Pooled:
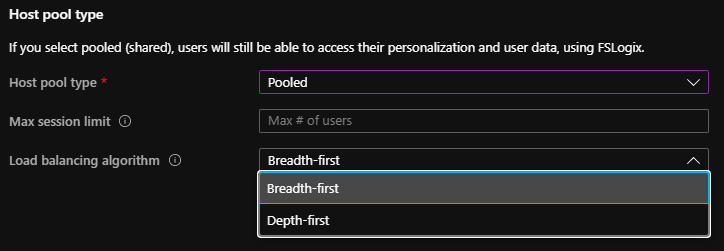
- Max session limit: Specify the maximum number of users that will be assigned to a session host.
- Load balancing algorithm: Breadth-first will spread user sessions across all available session hosts. Depth first will connect users to a single session host until the max session limit is reached, and then repeat the processes using the next available session host.
Once you have completed the Basics tab, select Next: Virtual Machines.
Virtual Machines
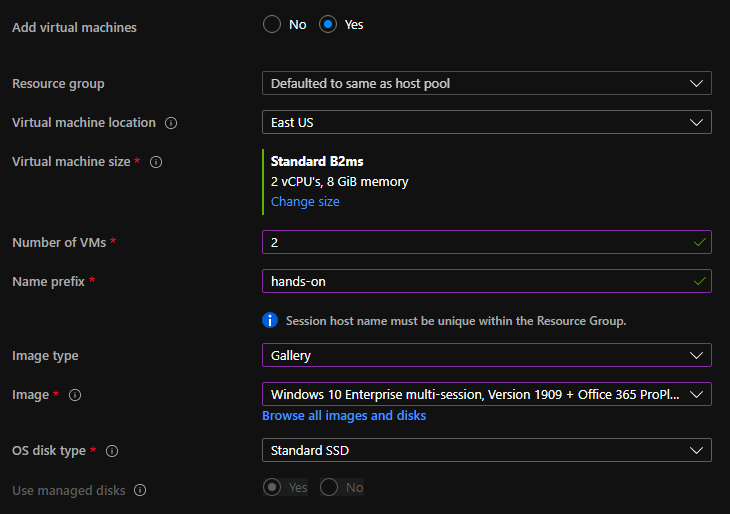
On the virtual machines tab, you will provide information about the VMs that will make up your host pool. By default, No is selected for Add virtual machines.

If you already have virtual machines you wish to use in your host pool, you can register them after you create the host pool.
To create new VMs for your host pool:
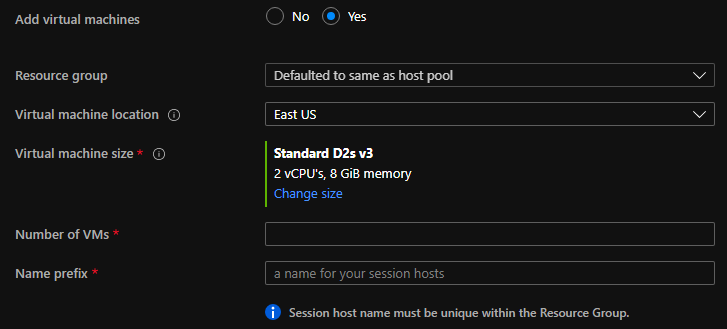
- Add virtual machines: Yes
- Resource group: This defaults to the same resource group as the host pool, although you can choose a different resource group.
- Virtual machine location: This defaults to the same region as the host pool, select a different region if you need to store the VMs closer to the user.
- Virtual machine size: You can leave the default size or select Change size to select a different size VM, including number of processors, memory, and storage capacity. Base your selection on the typical workloads your users will be running.
- Number of VMs: Specify the number of VMs to create in your host pool. Think about the total number of users connecting to WVD, the size of the VMs and the load-balancing algorithm you have chosen.
- Name prefix: This will be the prefix of the computer account name for your session hosts. WVD will add a -# to the prefix you specify (xxx-1, xxx-2, xxx-3, etc.).
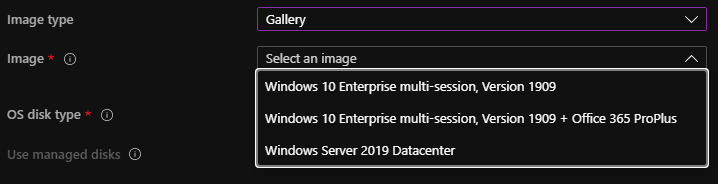
For the image type:

- Gallery: You can select an image from the Marketplace or a custom image you have created.
If you select Gallery, use the image dropdown list to pick an image
Or you can select Browse all images and disks…
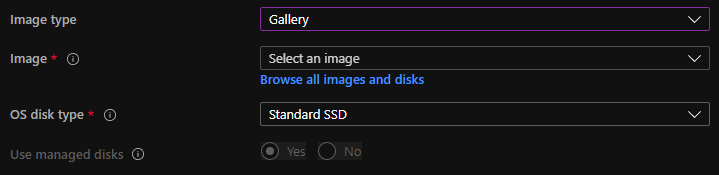
…to browse the Marketplace or select an image you have uploaded.

- Storage blob: You can select a generalized .vhd file from your storage account. Provide the URI to the image.

- OS disk type: Select the disk type based on your performance needs.

Next you will provide details about network and security.
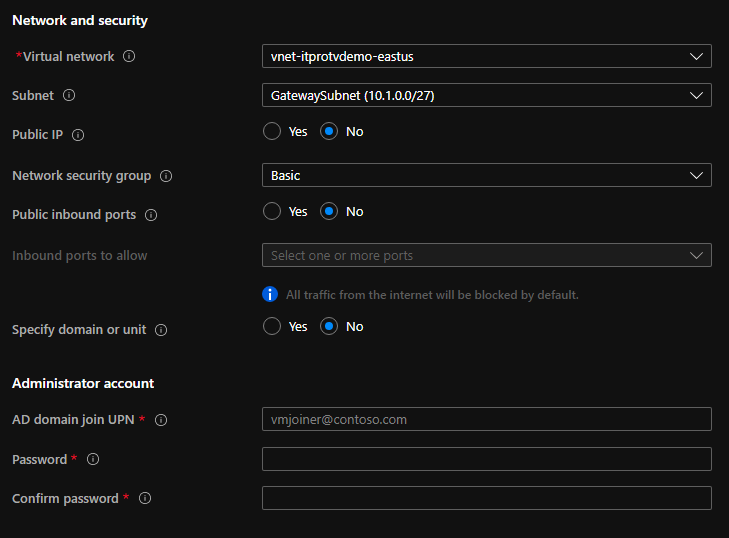
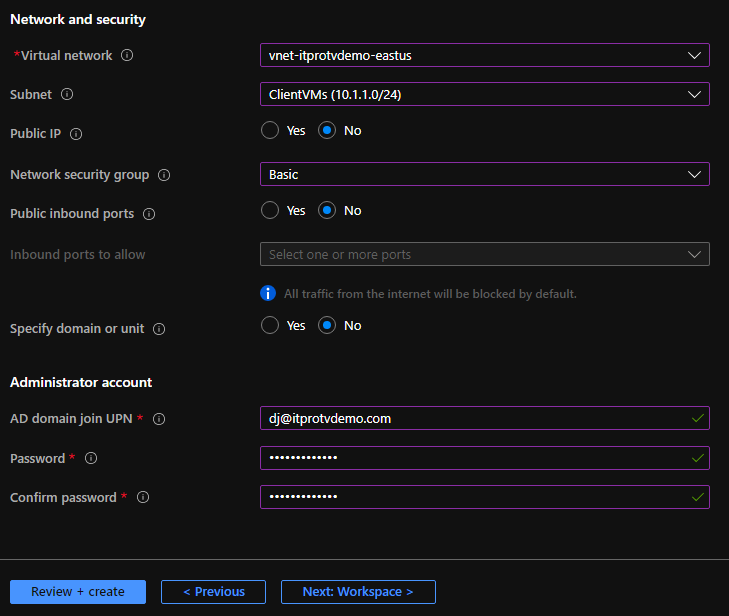
- Virtual network: Select the virtual network that contains the subnet to which the VMs will be attached.
- Subnet: Specify the subnet the VMs will be attached to. Because the VMs will be domain-joined, the subnet you select must have connectivity to your Active Directory domain.
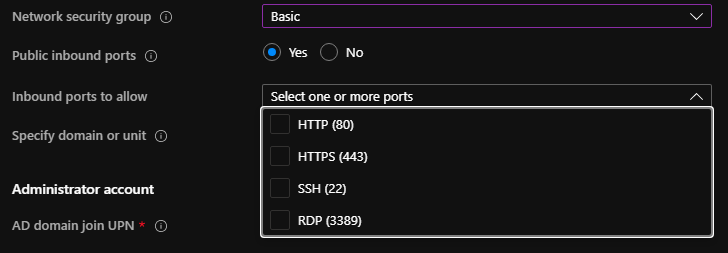
- Public IP: Specify if the VMs will be assigned a public IP. This is not required or recommended. If you select Yes, you must specify the SKU and assignment type (static or dynamic)

- Network security group: Choose between None, Basic, and Advanced.
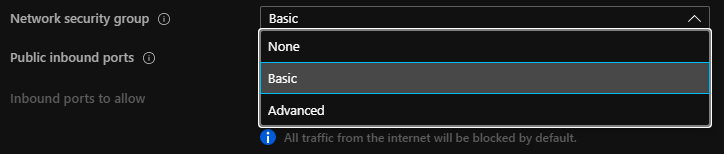
- None: No network security group will be assigned.
- Basic: Choose this option to allow public inbound ports. Choose Yes and then select the ports from a list.
- Advanced: Select this option to apply an existing network security group you have already created.

- Specify domain or unit: By default, this is set to No. The domain that the computer accounts will be created in is determined by the suffix of the AD domain join UPN specified in the next section. The computer accounts will be created in the default computer account OU. If you choose Yes, you can specify a different domain to join, like a child domain, and/or a specific OU to create the computer accounts in (think group policy application)

The last section of the virtual machines tab is the Administrator Account:
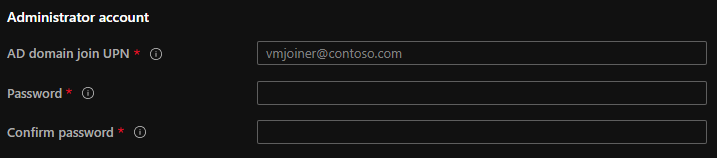
- AD domain join UPN: Enter the UPN of the account that will be used to join the VMs to the domain. It is recommended to use a standard domain account that has been delegated the right to join computers to the domain. This account will be a local admin on the newly created VMs.
- Password: Enter the password for the account listed above. This will become the password for the local admin on the VMs. You can change the domain user account password after deployment.
After completing the Virtual machines tab, select Next: Workspace.
Workspace
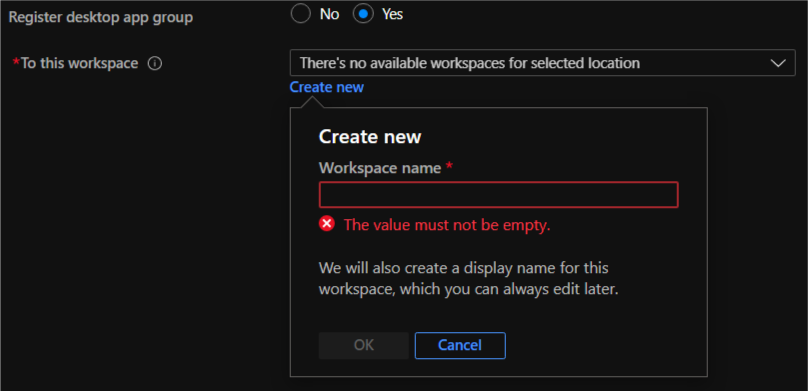
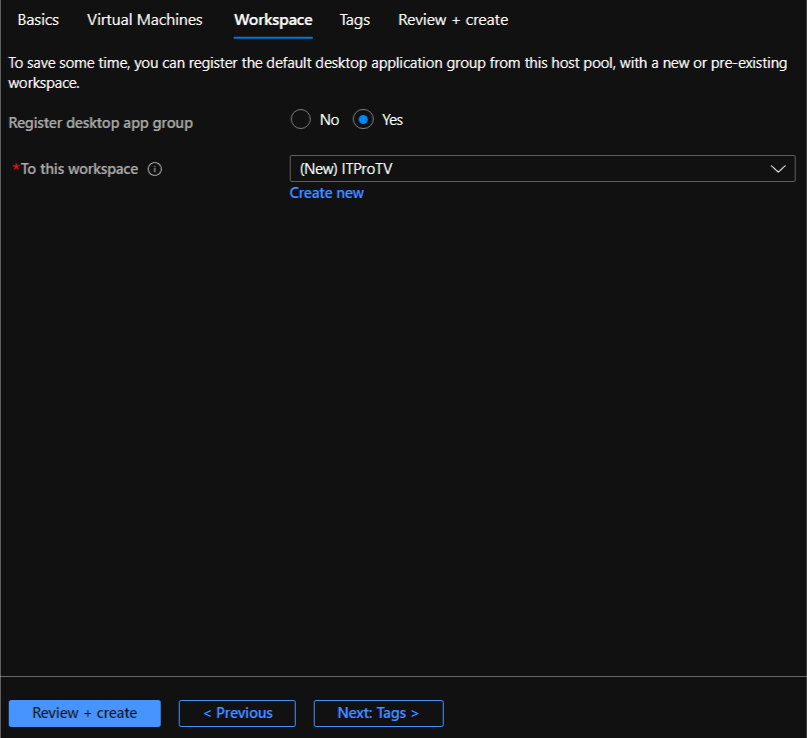
WVD resources are made available to users by registering app groups to workspaces. Then, users subscribe to workspaces to access those WVD resources. When you create a host pool, a desktop app group is created by default. This app group gives users access to the full desktop of the image you have selected for your host pool VMs. For users to access this desktop app group, it must be registered to a workspace. By default, No is selected for Register desktop app group. If you do not register the Desktop app group now, you will have to do it later before users can access it.

To register the Desktop app group now:
- Register desktop app group: Yes
- To this workspace: You can register the desktop app group to an existing workspace by selecting it from the list. To register the desktop app group to a new workspace, select Create new and provide a name for the workspace.
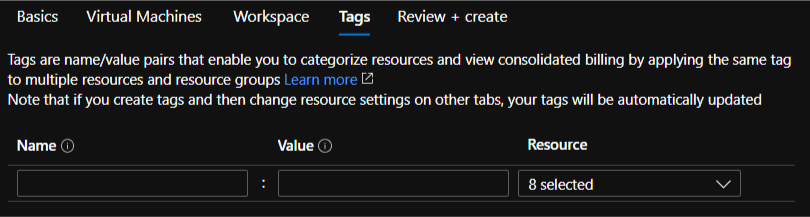
After completing the Workspace tab, you have provided all the required information to deploy WVD. Tags are used to categorize resources in Azure for viewing and billing, but they are optional. If you want to create and assign tags, select Next: Tags and fill in the name/value pairs.
Once you have completed the Tags tab, or if you choose not to assign tags, select Review + create.
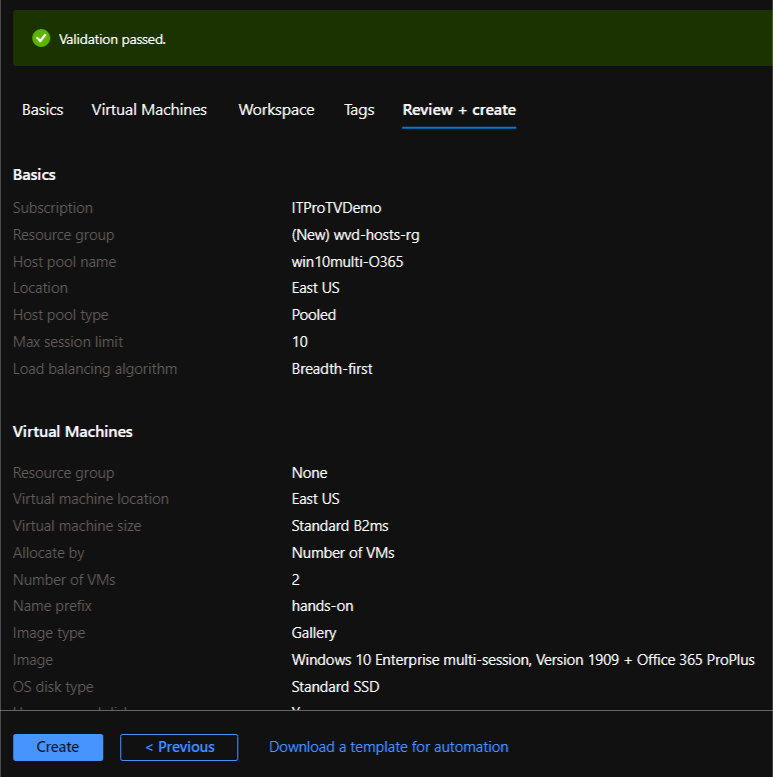
Review + create
On the review + create tab, you have a chance to review the information about your deployment and make sure it looks correct. If it does not, select Previous to go back and make the appropriate changes. Azure will run your template through a validation process as well. If all the required information has been correctly provided you will see a green bar stating Validation passed. If validation fails, read the error to determine what needs to be fixed.
Once you are satisfied with the information and validation passes, select Create to start the deployment process.
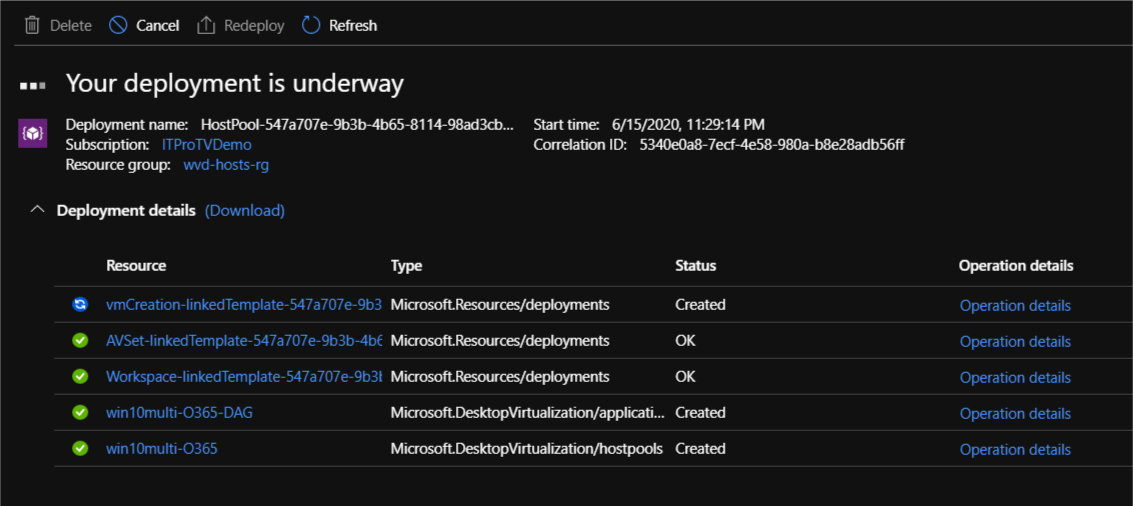
The deployment process typically takes about 15 minutes, your time may vary. You can monitor the process and get operation details as the deployment progresses.
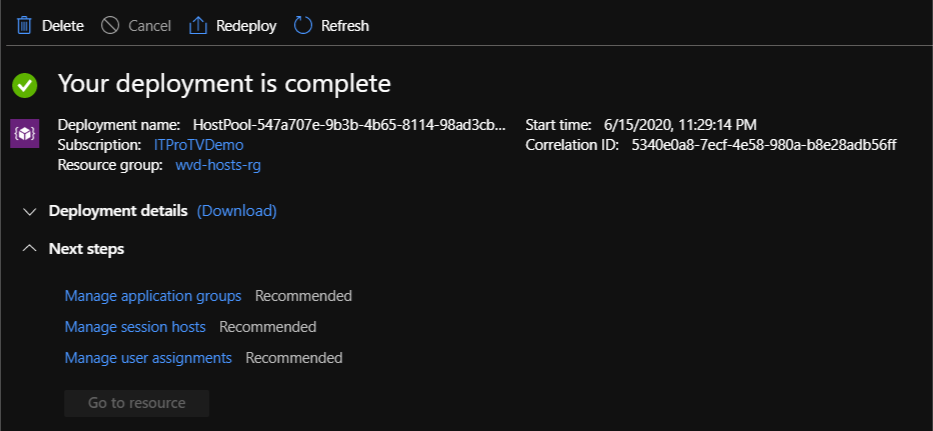
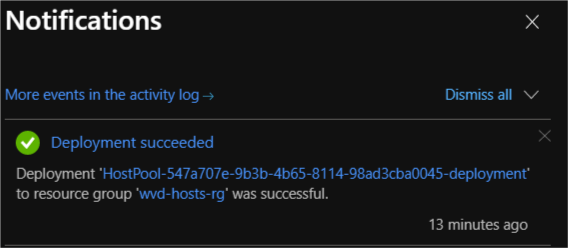
If everything goes well, your screen will change to indicate your deployment is complete, and you will be notified your deployment succeeded. Congratulations, you have finished creating a host pool using the Azure portal!
If your deployment did not complete successfully, look at the deployment details to determine on which step the deployment failed. Some common issues to check are:
- Name resolution: Azure must be able to resolve your domain name to locate a domain controller.
- Network connectivity: The VMs must be able to connect to a domain controller to join the domain.
- Credentials: Make sure the credentials you specified has the rights to join a machine to the domain, and the password is correct.
To see your new host pool, navigate back to Windows Virtual Desktop and under Manage select Host pools. Then select the host pool you created.

Here you will be able to view the details of the host pool you created. You can see the host pool type, the VM size and disk type. You can also see the number of session hosts, active sessions, application groups and applications.
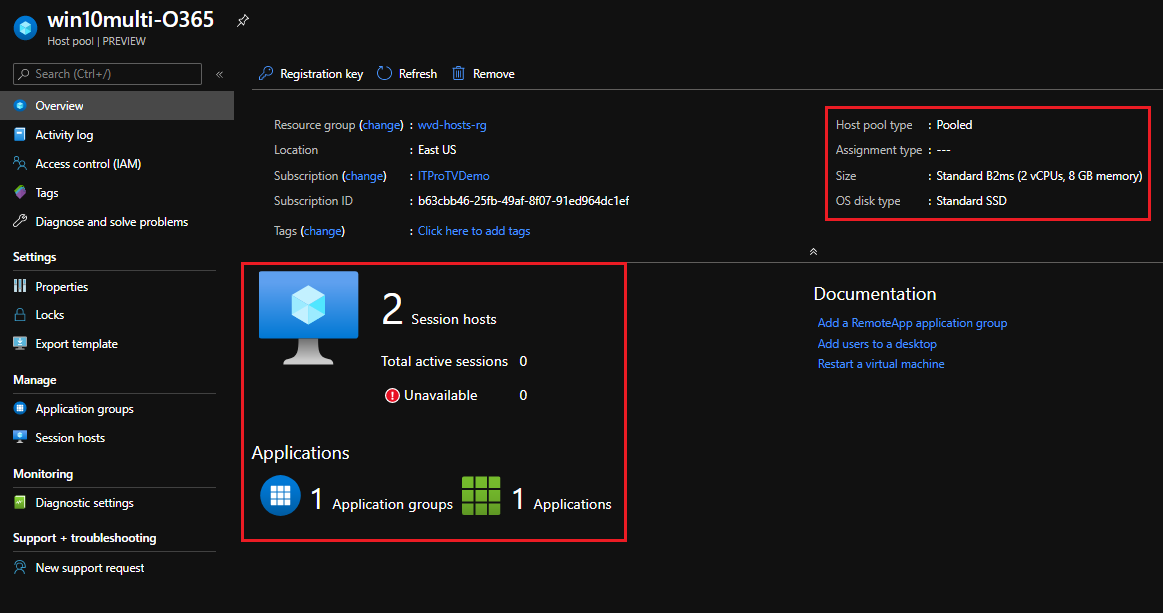
The one application group is the desktop application group, and the application is the desktop itself. Although at this point, no one will have access, until you create assignments.
What’s next?
Creating a host pool using the Azure portal is a straightforward process. If you have all the required information, deployment can be done in under 20 minutes! Once you have a host pool, the next step will be to manage app groups and create assignments so users can access WVD resources.
Make sure to check out more great articles at ITProTV
Comments are closed