ⓘ Important
This content applies to the Windows Virtual Desktop Fall 2019 release without Azure Resource Manager objects.
Click here for guides using Windows Virtual Desktop Spring 2020 update public preview with Azure Resource Manager objects.
So the first step in setting up Windows Virtual Desktop is creating a tenant. Before you do that however, examine your environment and make sure it meets the requirements listed in the previous post.
Infrastructure Requirements
Let’s start with the infrastructure requirements.
- An Azure Active Directory
An Azure subscription includes a default directory. If you already have an Azure subscription, you are good to go. If you don’t, sign up for a free trial here.
I will be using the ITProTVDemo directory.
- A Windows Server Active Directory in sync with Azure Active Directory. You can configure this with one of the following:
- Azure AD Connect (for hybrid organizations)
- Azure AD Domain Services (for hybrid or cloud organizations)
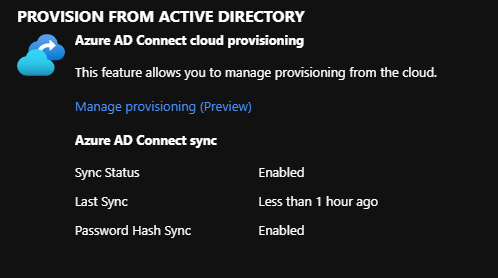
I have a hybrid configuration, with an on-premises Windows Server Active Directory domain. I have Azure AD Connect configured to synchronize Windows Server AD with Azure AD.
- An Azure subscription that contains a virtual network that either contains or is connected to the Windows Server Active Directory
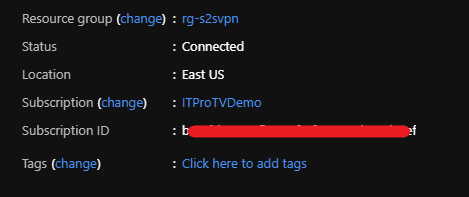
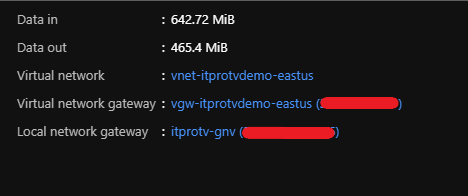
I have a site-to-site VPN between my on-premises domain and Azure. This will allow the virtual machines to access the domain controller and join the domain.
My on-premises subnet is 10.0.100.0/24 and my Azure virtual network subnet is 10.1.1.0/24. Remember to make sure there is no overlap, or routing between the two networks will fail.
Another gotcha is to make sure the VPN is connected. Initially, I had set up the S2S VPN as a demand-dial connection. I had failures when deploying a new host pool, and realized the VMs weren’t able to join the domain. Once I changed the S2S VPN to persistent, everything worked. A demand-dial connection would work, you would just need to initiate the connection first, and make sure it doesn’t disconnect before the host pool configuration finishes.
Licensing Requirements
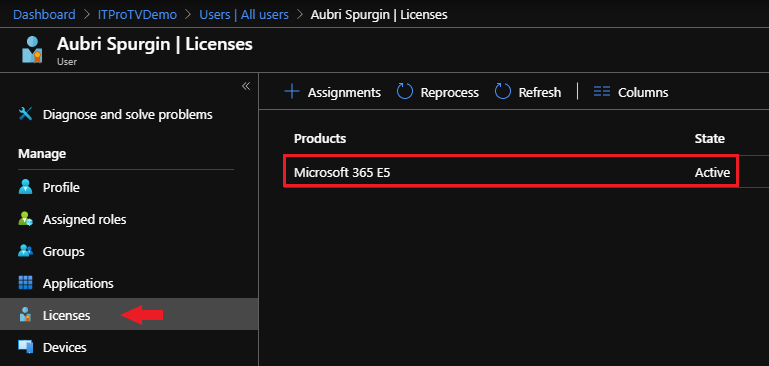
Next, verify the licensing requirements are met. I am using aubri@itprotvdemo.com for this demonstration, and I have assigned an appropriate license. A license will need to be assigned to each user that will access Windows Virtual Desktop.
Now that you have verified that your environment meets all of the requirements, you can begin creating a tenant.
Grant permissions to Windows Virtual Desktop
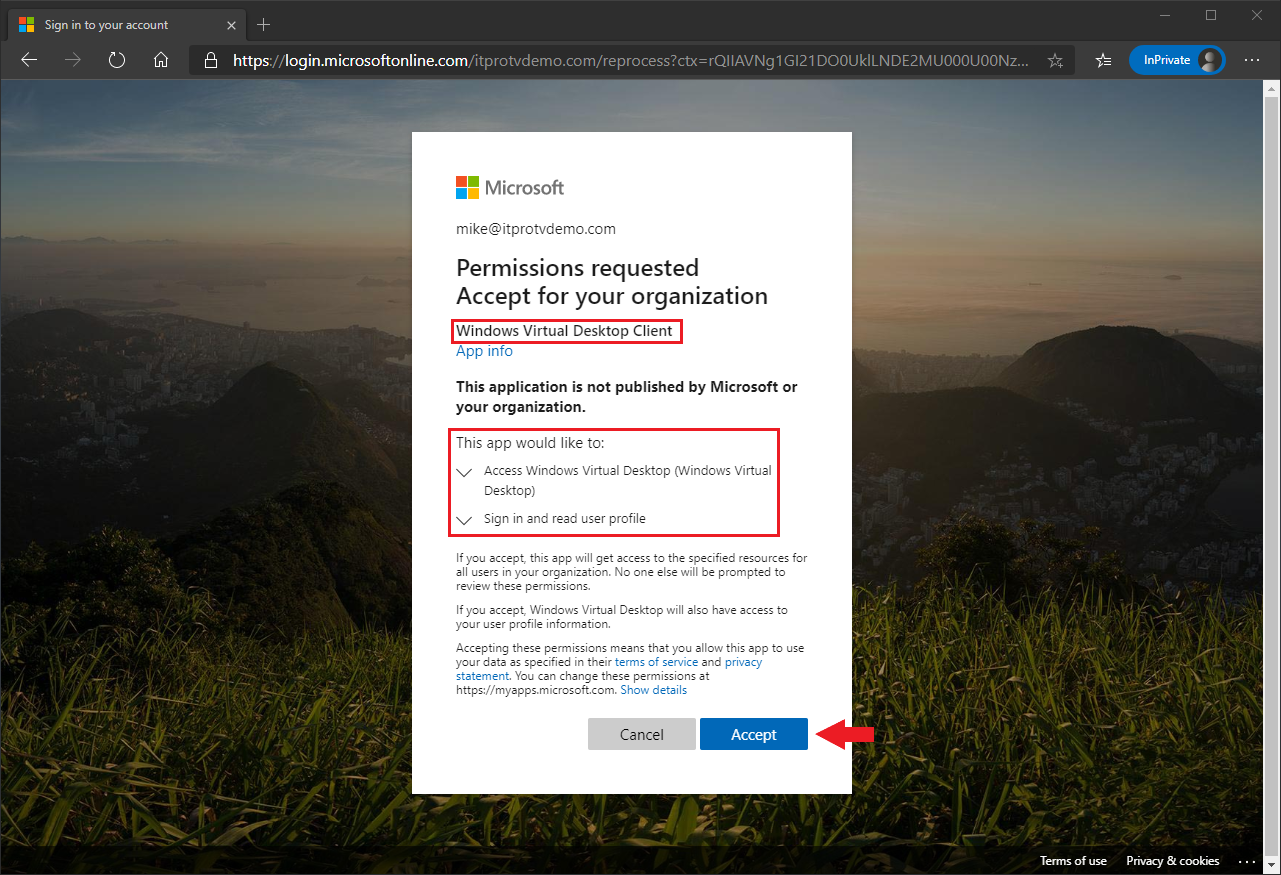
Granting permissions to the Windows Virtual Desktop service lets it query Azure Active Directory for administrative and end-user tasks. Open a browser and navigate to https://rdweb.wvd.microsoft.com.
- Select Server App in the consent option drop-down list.
- Provide your AAD Tenant GUID or Name.
- Click Submit.

- Authenticate using a Global administrator account.
- Review the permissions requested, and click Accept.

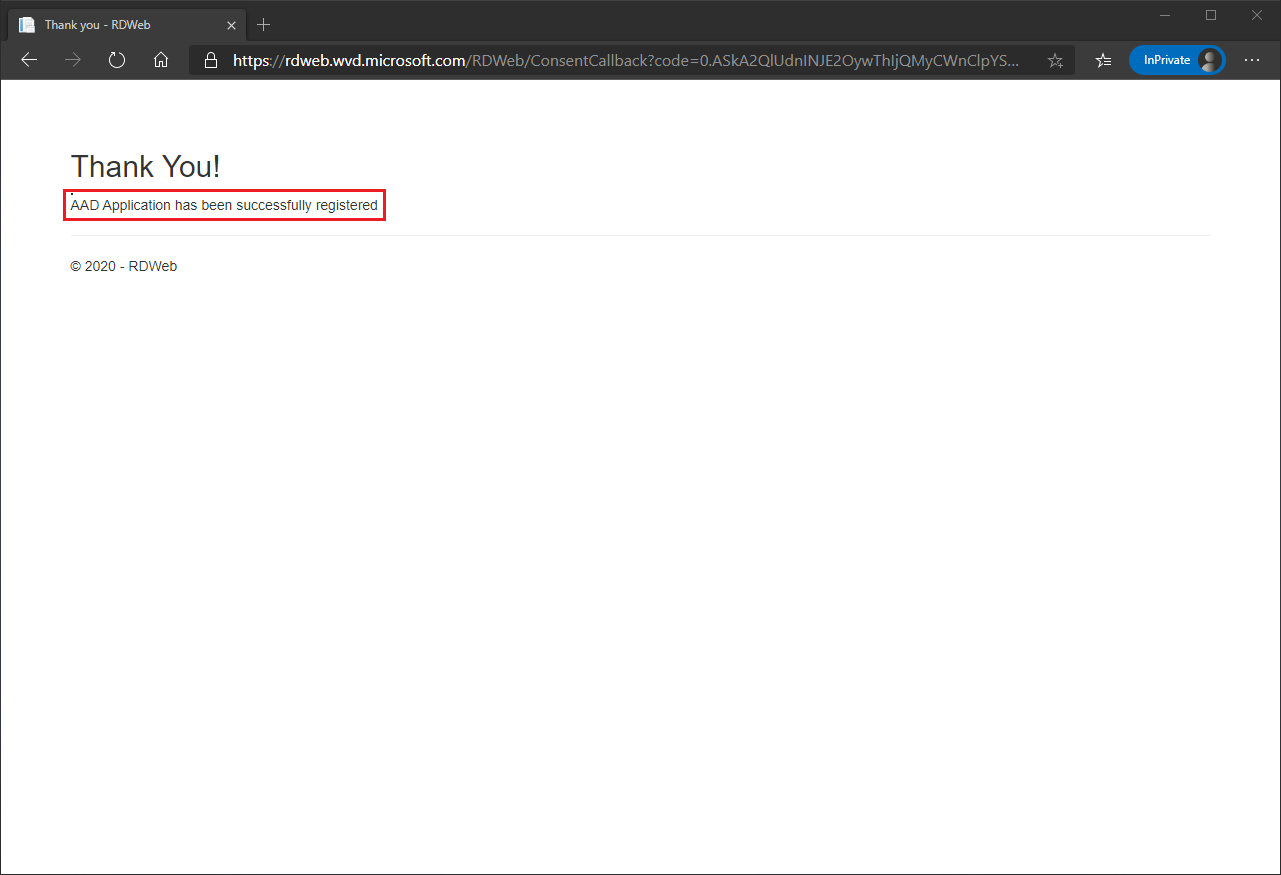
If permissions were granted successfully, you will get a confirmation. If not, verify the AAD Tenant GUID or name, and that the account being used has the Global administrator role assigned.
Now repeat the entire process, this time selecting Client App from the Consent option drop-down list.
Make sure to wait 30 seconds between consenting “Server” and “Client” apps so that the changes are propagated in Azure.

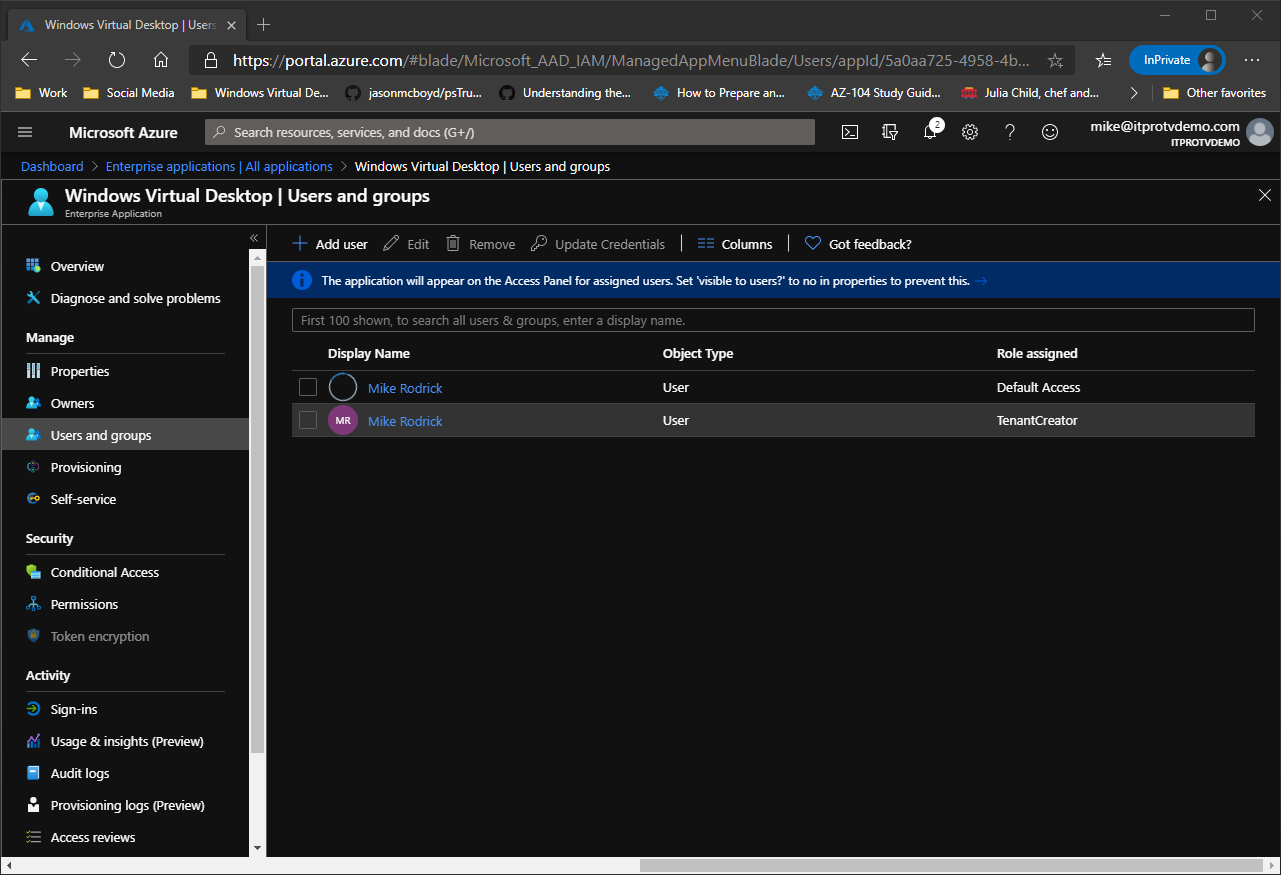
Assign the TenantCreator application role
In order to create a Windows Virtual Desktop tenant, you will assign the TenantCreator application role to a user. This does not have to be a Global administrator account, but even a Global administrator must be assigned the TenantCreator role.
- Login to the Azure Portal with your global administrator account.
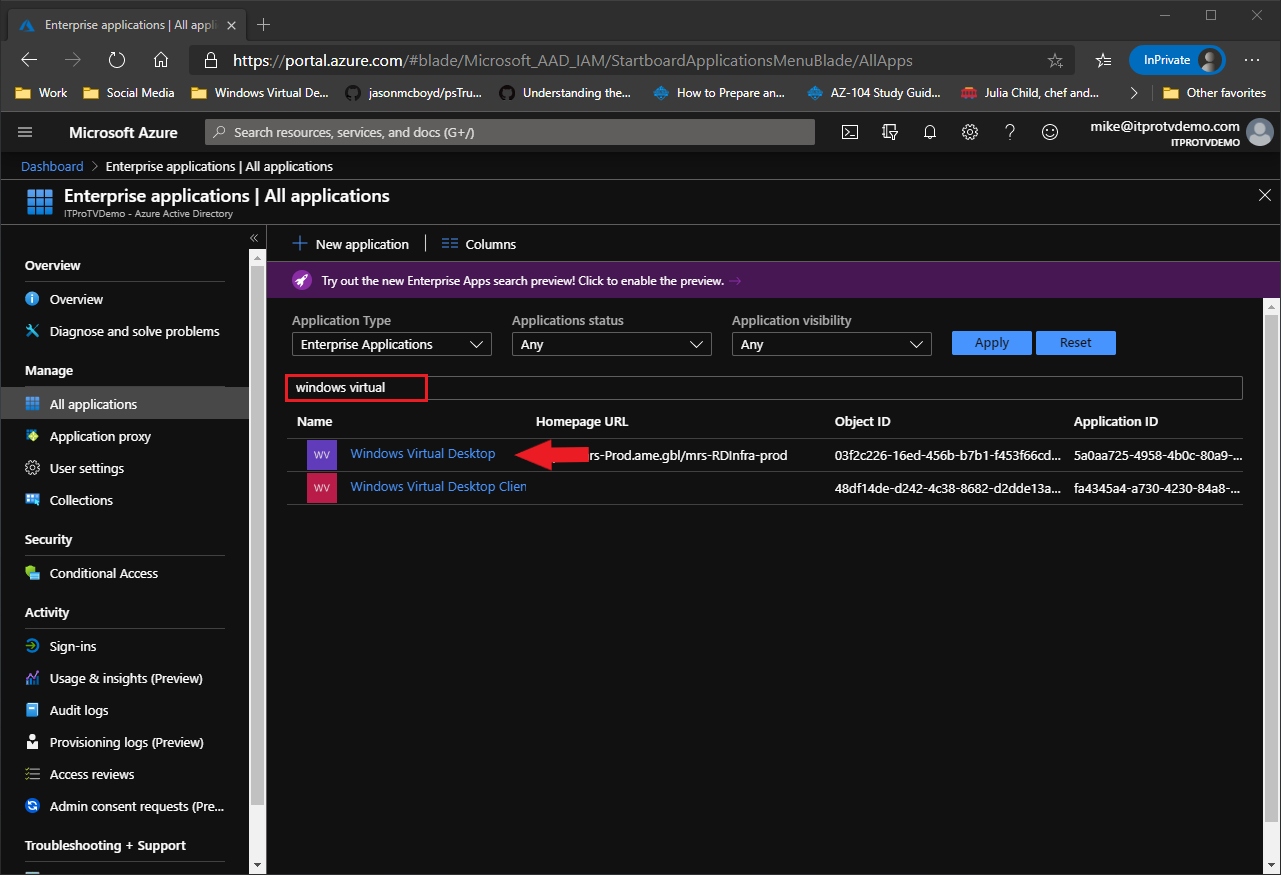
- Search for Enterprise applications, and select Enterprise applications under Services.
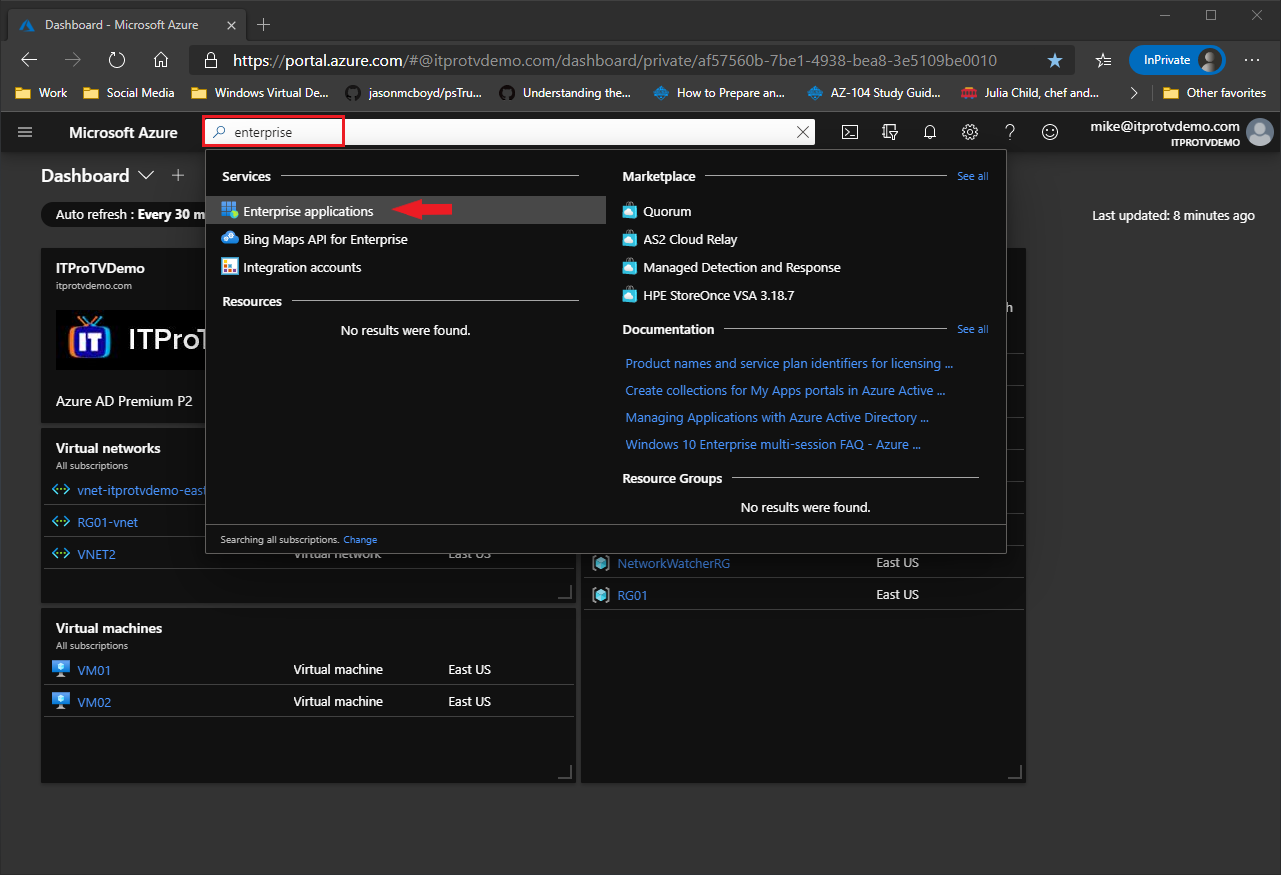
- From Enterprise applications, search for Windows Virtual Desktop, and select Windows Virtual Desktop (not Windows Virtual Desktop Client).
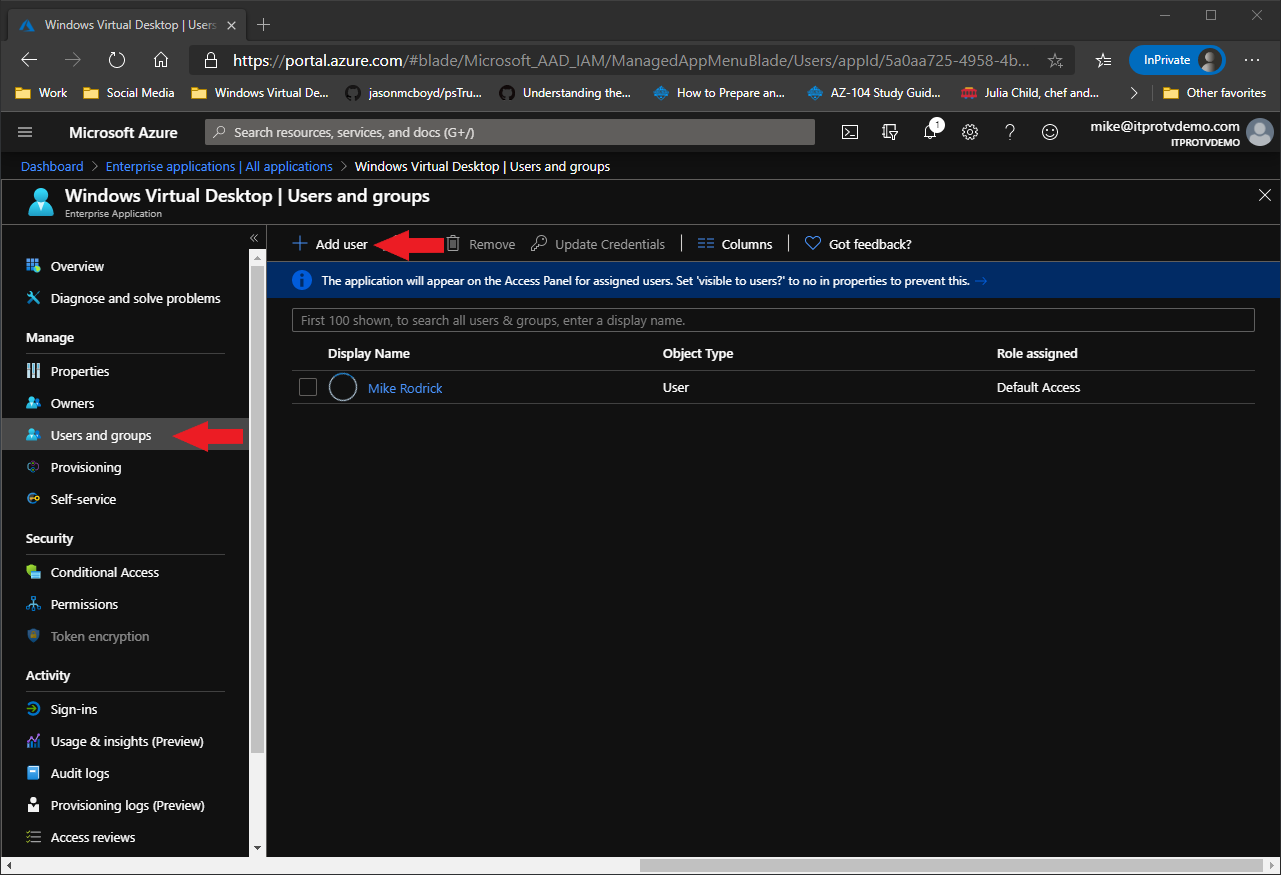
- Select Users and groups.
- Select Add user.
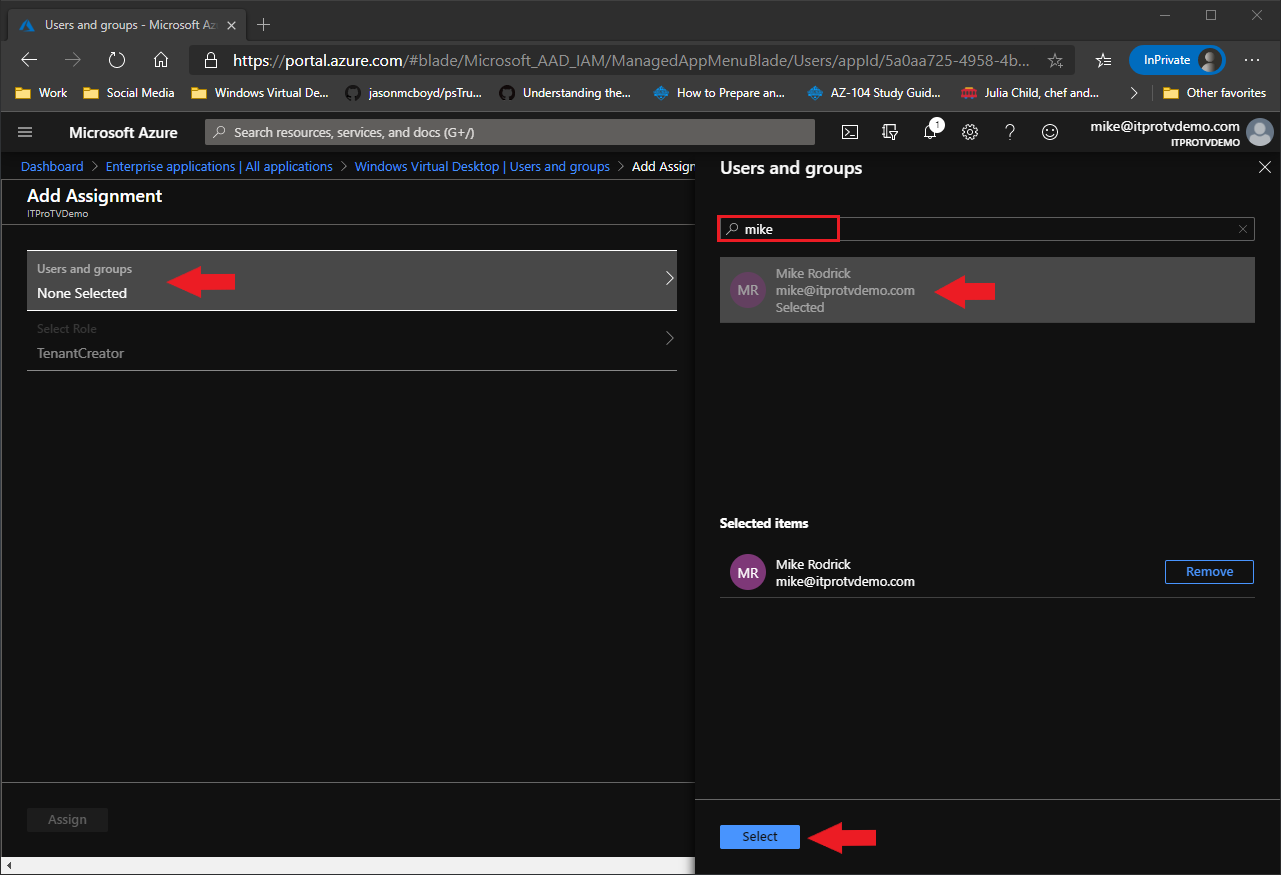
- Select Users and groups on the Add Assignment blade.
- Search for a user account that will create your Windows Virtual Desktop tenant.
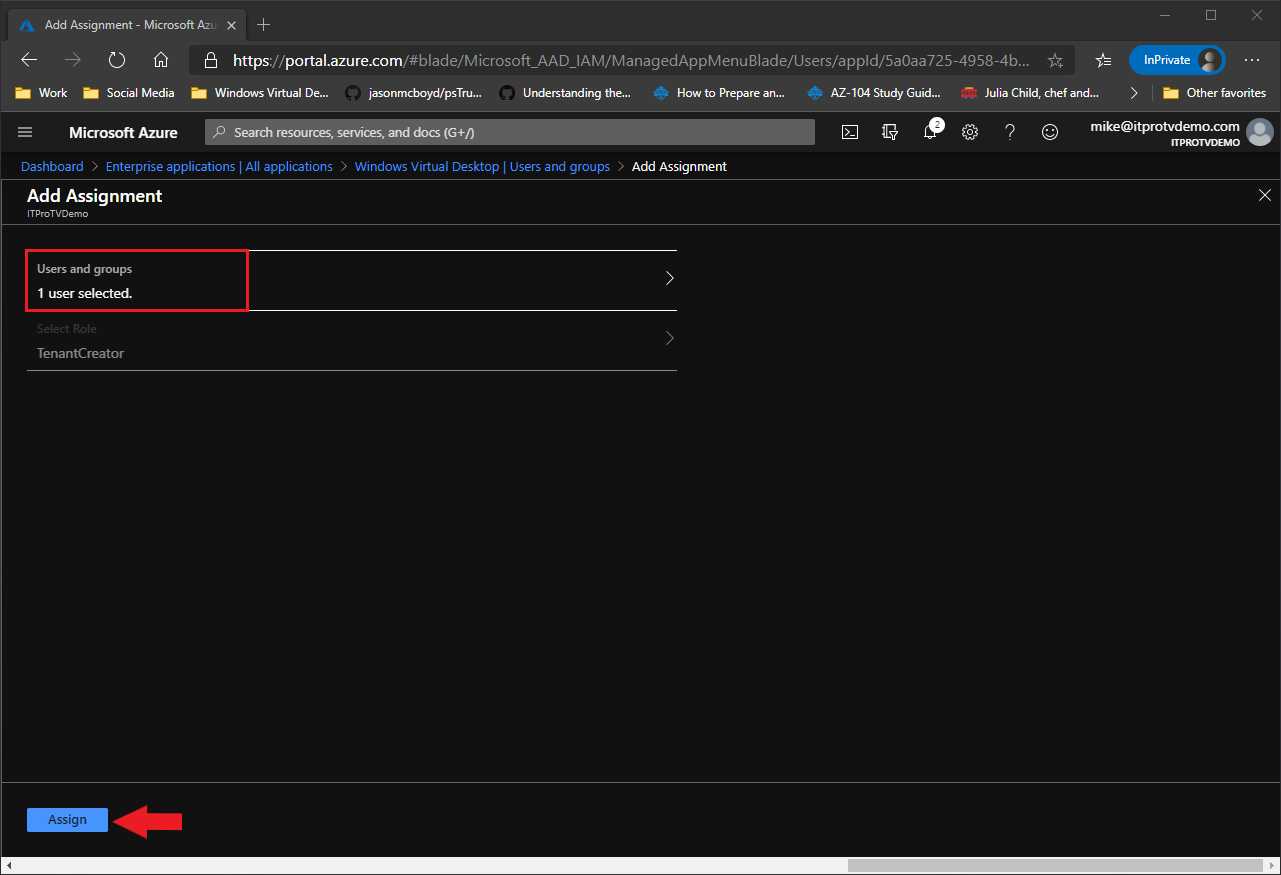
- Select the user account, click Select.
- Click Assign.
- Verify the account is now listed with the TenantCreator role assigned.
Gather Required Information
To create your Windows Virtual Desktop tenant, you will need:
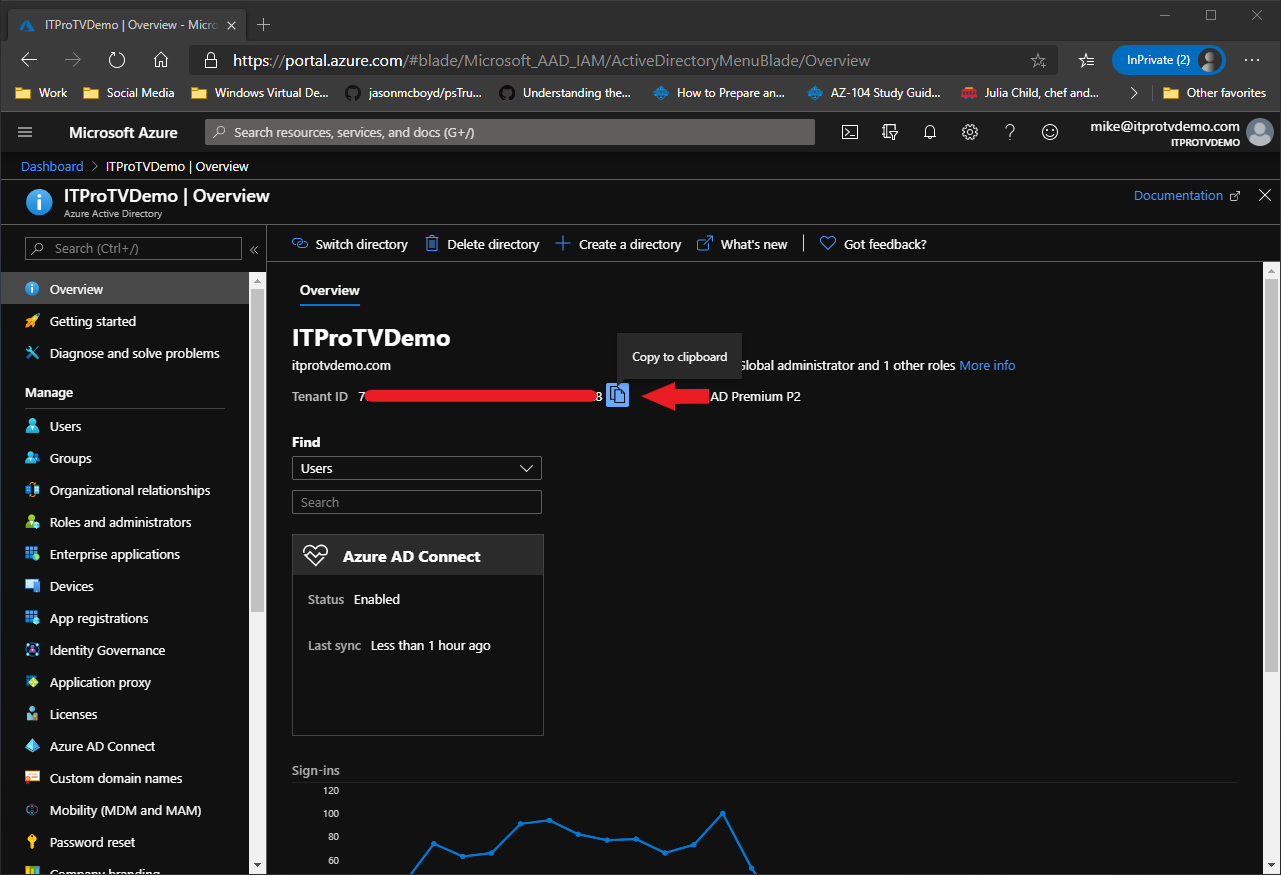
- Your Your Azure Active Directory tenant ID (or Directory ID)
- Your Azure subscription ID
To find your Azure AD tenant ID (aka Directory ID):
- In the Azure portal, navigate to Azure Active Directory.
- The tenant ID is displayed on the overview pane.
- Click the Copy to clipboard button, and paste the tenant ID into a file for later. This will be used as your AadTenantID.
To find your Azure subscription ID:
- In the Azure portal, search for subscriptions.
- Select Subscriptions under services.
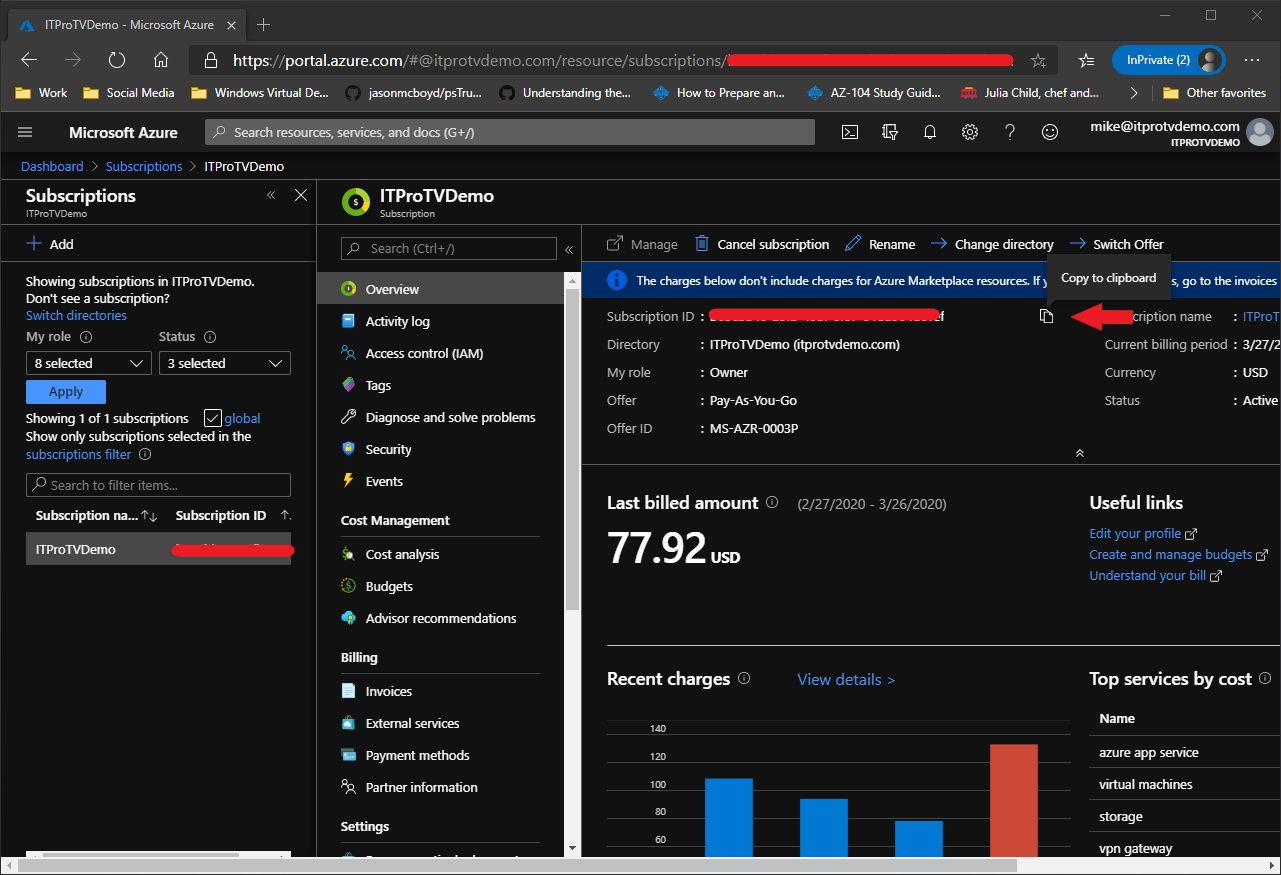
- Select the appropriate subscription from the list of subscriptions (if you have more than one). You can see the subscription ID in the list, but it’s easier to copy from the next screen.
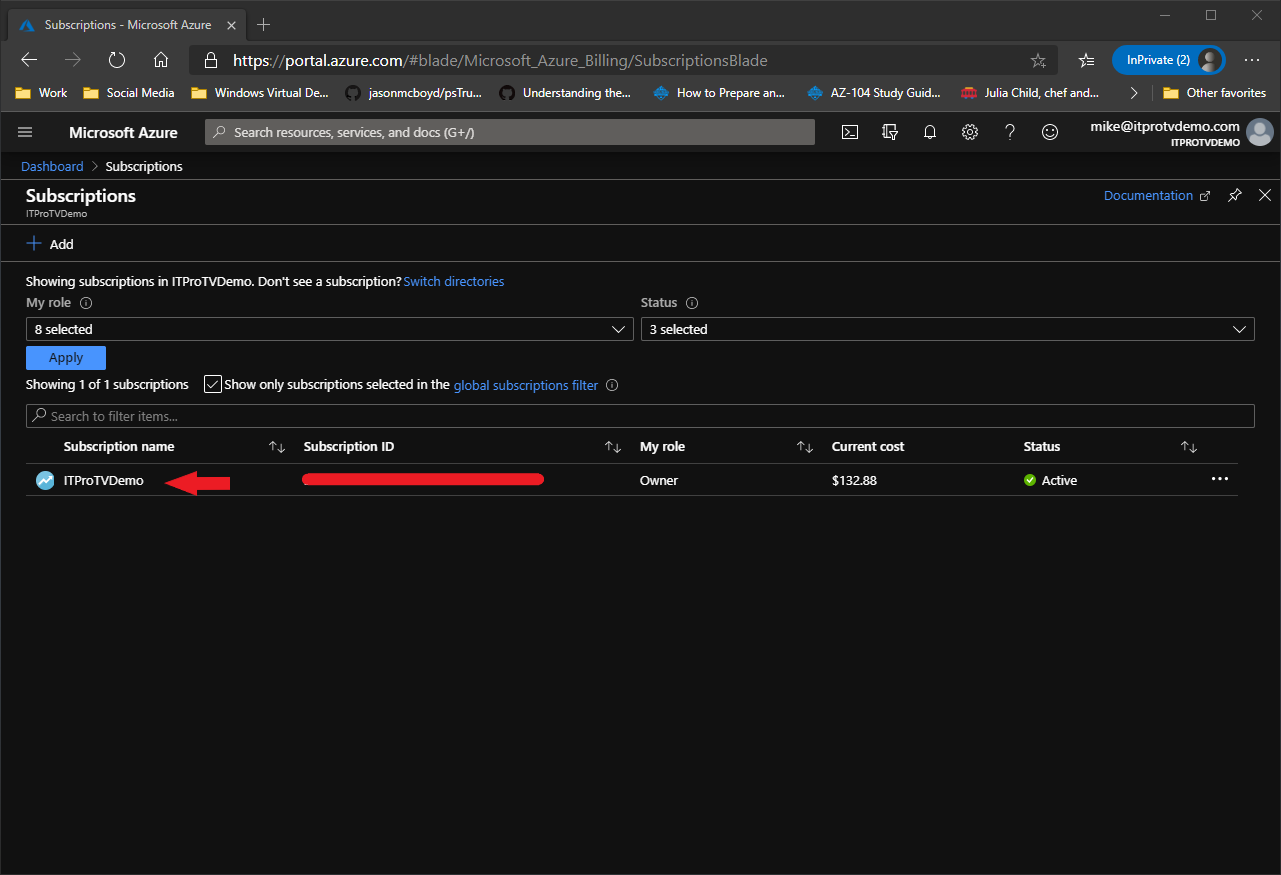
- Click the Copy to clipboard button, and paste the subscription ID into a file for later. This will be used as your AzureSubscriptionID.
Install the PowerShell Module
To create the Windows Virtual Desktop tenant, you will be using PowerShell. You will need to install and import the Windows Virtual Desktop PowerShell module.
- Launch PowerShell as an administrator.
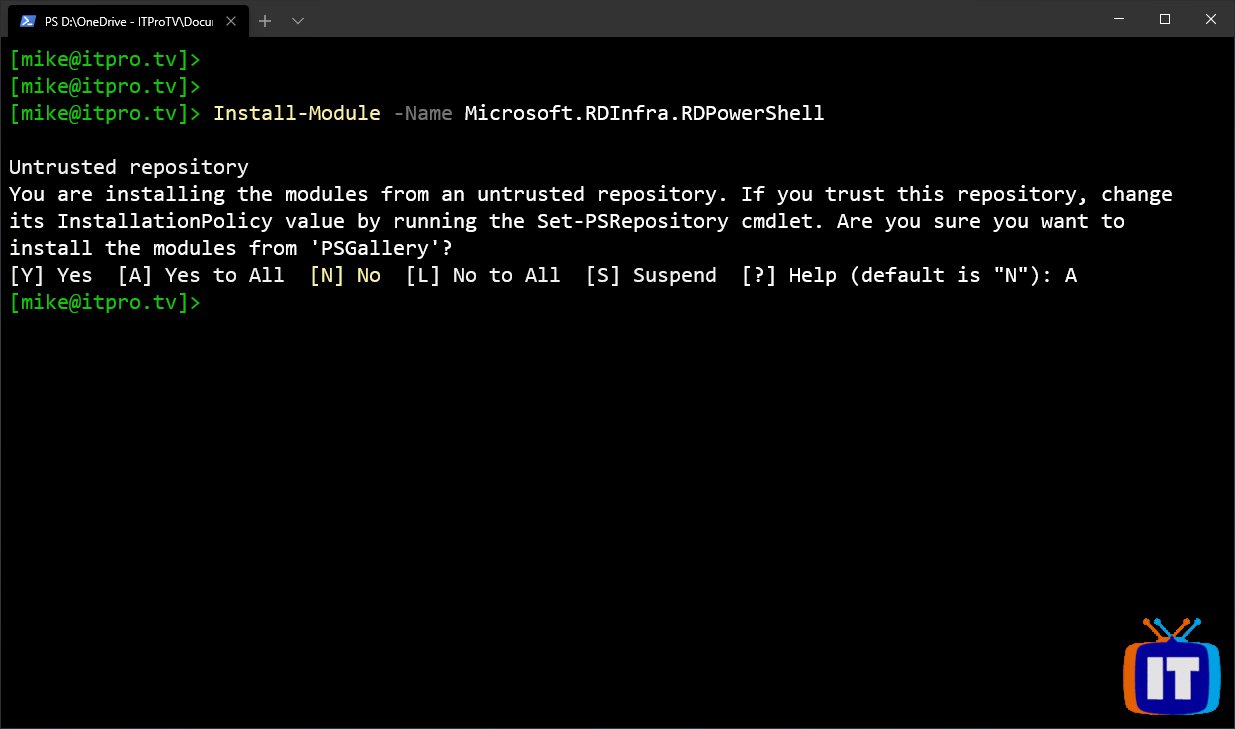
- Type the following command and press Enter.
Install-Module -Name Microsoft.RDInfra.RDPowerShell- Type A and press Enter to install modules from PSGallery.
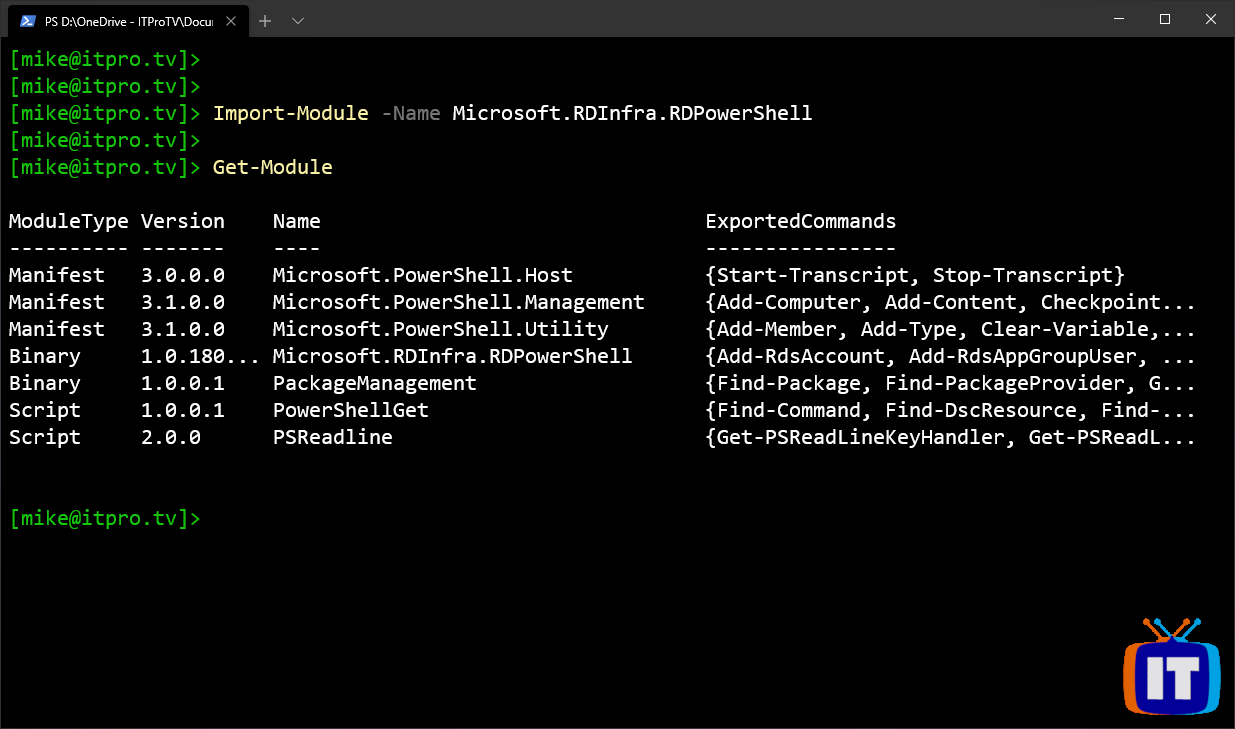
- Type the following command and press Enter.
Import-Module -Name Microsoft.RDInfra.RDPowerShellYou can use the Get-Module cmdlet to verify the RDPowerShell module was imported into the current session.
While it’s not necessary to import the module in the latest versions of PowerShell, it’s still a good practice.
Create the Windows Virtual Desktop tenant
Once you have the RDPowerShell module, you will be able to sign in to Windows Virtual Desktop.
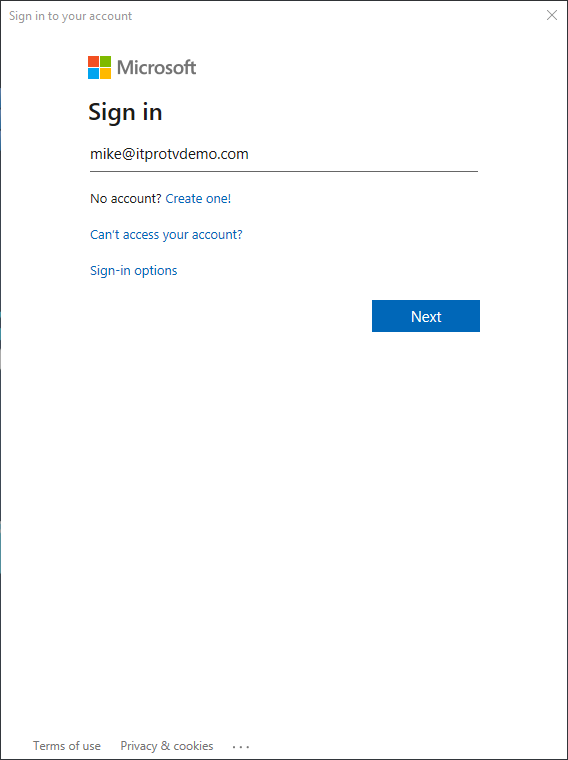
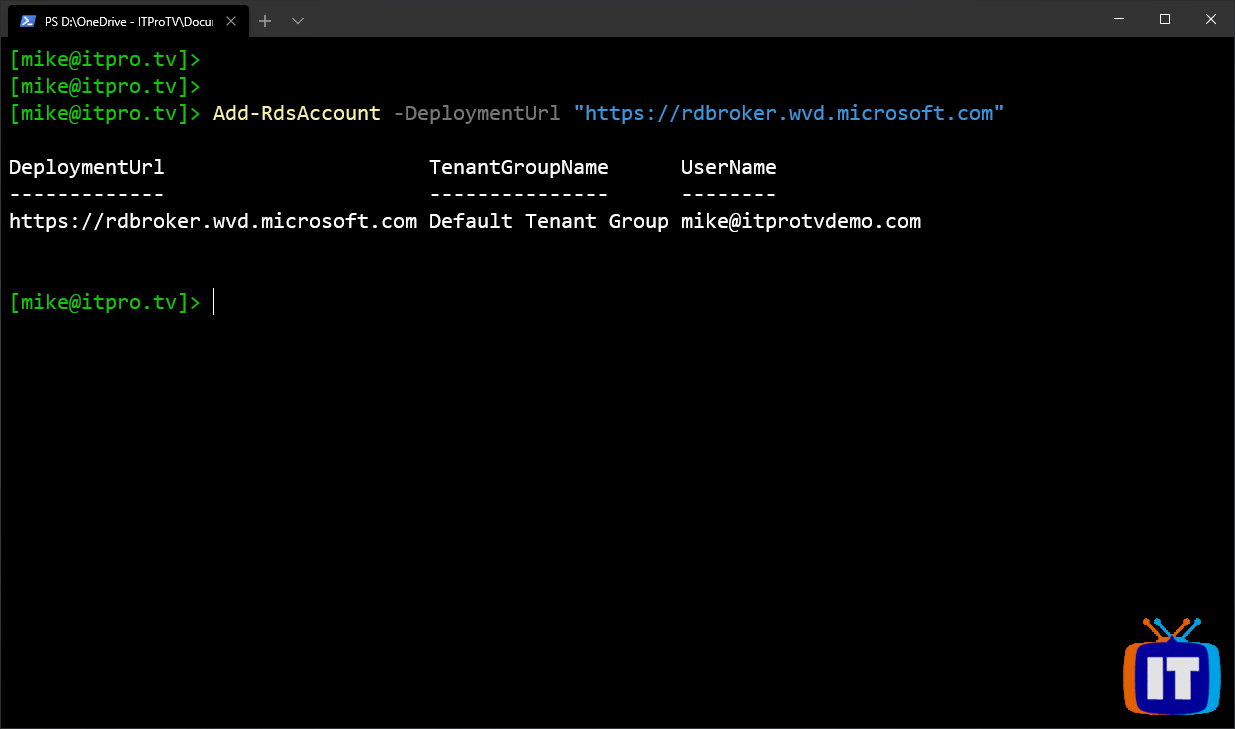
- Type the following command and press Enter.
Add-RdsAccount -DeploymentUrl "https://rdbroker.wvd.microsoft.com"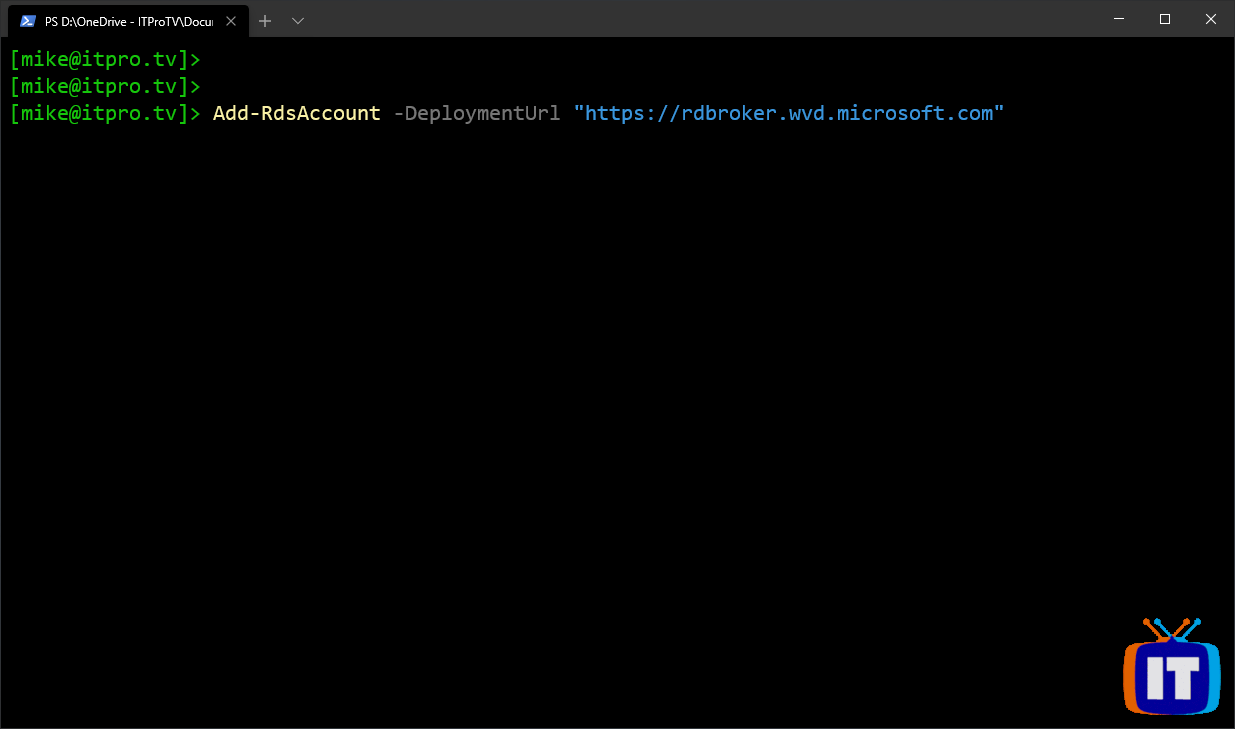
- Authenticate using the account that you assigned the TenantCreator role to earlier.
PowerShell will show that you have successfully signed in to Windows Virtual Desktop.
Once authenticated, create a new Windows Virtual Desktop tenant with the following PowerShell command.
New-RdsTenant -Name <TenantName> -AadTenantId <DirectoryID> -AzureSubscriptionId <SubscriptionID>Replace the bracketed values with the IDs you copied earlier. You can copy and paste the IDs into the cmdlet, or store them in variables (I prefer the latter, as long as I keep the PowerShell session open, I can recall the values easily). The name you choose for your new Windows Virtual Desktop tenant should be globally unique.

What’s next
Now that you have created a tenant, the next step will be to create a service principal in Azure AD and grant it access to the Windows Virtual Desktop tenant you just created. The service principal will be used to create a host pool within the tenant.
Make sure to check out more great articles at ITProTV
I’ve also done two webinars on Windows Virtual Desktop. You can watch them on demand for free:
Comments are closed